Today we are going to learn how to make buttons disabled in the java language.
Disable on startup:
So open up your program you are using to create your programs. In my case, I am using NetBeans IDE. It is a great program for beginners, and even for more advanced users.
Once you have it open, and you are in your project find the line where it says ...
" public (<INSERT PROGRAM NAME HERE>)() {
initComponents();
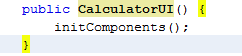 }"
}"
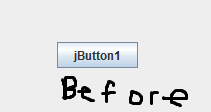
Before we add anything you want to get your button name.
My button name is "jButton1" but depending on what you named it earlier, it could be different.
Go to the end of the "();" after initComponents and press enter(return).
 Now add in the following text
"jButton1.setEnabled(false);"
You are now done.

Disable from a button:
 To disable from a button is very easy. In my example, I am going to have two buttons. jButton1 which is going to disable jButton2.
So for jButton1, you are going to have to add an action listener to it. In NetBeans IDE, you just double click the button, and you get this.


If not, add that text in your IDE.

Then, you are going to write your code in the // TODO line
You write in what I said earlier... "jButton1.setEnabled(false);"
But we don't want to disable the button we are clicking... We want to disable button number 2
So we write "jButton2.setEnabled(false);
If you are feeling adventurous:
If you want to go the extra mile, you can make another button that
enables that button again.
Add another button, and double click it (or add an action listener yourself, depending on your software) and add
"jButton2.setEnabled(false);"
Disable from a button:
To disable from a button is very easy. In my example, I am going to have two buttons. jButton1 which is going to disable jButton2.So for jButton1, you are going to have to add an action listener to it. In NetBeans IDE, you just double click the button, and you get this.
If not, add that text in your IDE.
Then, you are going to write your code in the // TODO line
You write in what I said earlier... "jButton1.setEnabled(false);"
But we don't want to disable the button we are clicking... We want to disable button number 2
So we write "jButton2.setEnabled(false);
If you are feeling adventurous:
If you want to go the extra mile, you can make another button that
enables that button again.
Add another button, and double click it (or add an action listener yourself, depending on your software) and add
"jButton2.setEnabled(false);"
No comments:
Post a Comment